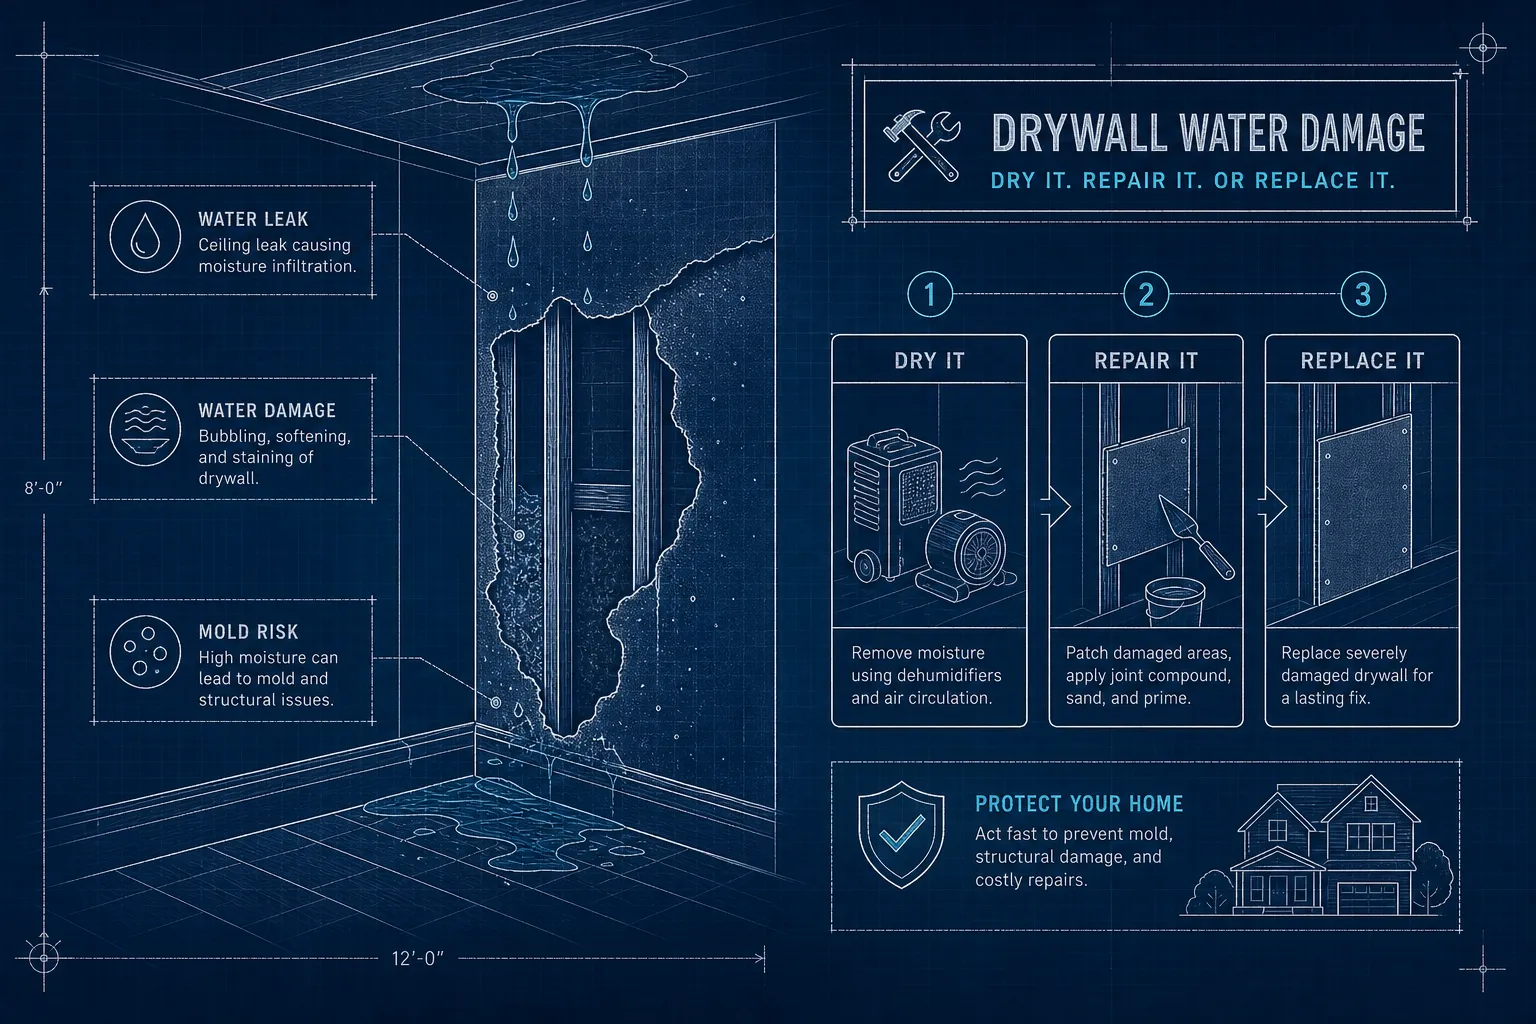
Drywall water damage is one of the fastest routes to mold and structural problems on the Gulf Coast, and it starts the moment you press your palm flat against the wall and feel it give. That soft, spongy response is the gut-drop moment every homeowner dreads, and it means the clock is already running. Water-damaged drywall doesn't wait around, and neither does the mold that follows it.
On the Mississippi Gulf Coast, the culprits are familiar: storm-driven rain finding a gap in the flashing, a supply line that finally gives up, or a roof that took a hit and kept quiet about it for weeks. The outcome is the same either way. You're standing in front of a stained ceiling or a soft wall section trying to figure out what comes next. At 3H Construction, restoring water-damaged walls and ceilings across coastal Mississippi is the core of what we do, and the process always starts with an honest assessment before a single tool gets picked up.
This guide walks you through everything in sequence: reading the signs, drying the material safely, deciding whether to repair or replace, executing the repair correctly, understanding what it costs, and knowing when a professional restoration is the smarter call. Work through each step in order; skipping ahead creates rework.
Reading the signs: how to spot drywall water damage before it gets worse
Catching wet drywall early is the difference between a simple patch and tearing out an entire wall section. The sooner you can move from suspicion to a confident assessment, the more options you have.
What surface stains and tide marks reveal
Yellow or brown discoloration is the most common first sign, often appearing as a soft ring on the ceiling or a streaked patch on an exterior wall. A single ring usually points to a one-time event, while stacked concentric rings signal a recurring leak. Paint that bubbles or blisters is telling you that moisture is trapped between the paper face and the finish coat. The stain's location matters too: damage directly below a bathroom points toward plumbing, while staining near the roofline or exterior walls narrows it to a building envelope issue.
The feel test: soft spots, sagging, and fastener failure
Press lightly on any suspicious area with your fingertips. A spongy or crumbling response means the gypsum core has absorbed enough water to lose its structural integrity, and that section can't be saved with cosmetic work. Sagging is a sign of fastener failure, meaning the panel has absorbed so much weight from the water that the screws or nails are no longer holding it to the framing. Never re-nail a sagging panel in place without addressing the moisture first; you'll be back doing it again in six months, if the ceiling doesn't come down sooner.
Odor and visible mold: when drywall water damage has gone deeper
A musty, earthy smell that lingers even after you've opened windows is a reliable indicator of active mold growth somewhere in the wall cavity. Try sniffing near electrical outlets, which open into the wall cavity and carry that odor outward even when the mold itself isn't visible from the surface. Mold appears on sheetrock as fuzzy, powdery, or slimy patches in black, green, gray, or white. What you see on the face is almost always the smaller part of the problem. Visible mold on the surface typically means mold has already colonized the back side of the panel, which changes the repair approach entirely from a patch job to a full removal. Drywall mold after water damage almost never stays contained to the surface layer. For more details on typical warning signs and what to look for, review signs of mold behind drywall.
The 24-48 hour rule: drying wet drywall before mold takes over
Mold begins colonizing water-saturated drywall within 24 to 48 hours of initial exposure. The window to save wet drywall is narrow but real, and how you dry it matters as much as how fast you start. For an illustrated timeline of mold growth after moisture exposure, see how long it takes for mold to grow on wet drywall.
Air movers and dehumidifiers: pairing them correctly for drywall water damage
Air movers accelerate evaporation from the drywall's paper face, while low-grain refrigerant dehumidifiers pull that moisture out of the air before it can settle back into the wall. Pair them by spacing air movers at 10 to 14-foot intervals along the wall and running the dehumidifier in a sealed room to maintain controlled drying conditions. Avoid using heat or overly powerful fans; both can damage the material and actually work against the drying process by causing surface deterioration before the interior moisture escapes. For recommended best practices and dos-and-don'ts when drying wet drywall, consult a guide on drying techniques for wet drywall.
Flood cuts and weep holes: when to open the wall
For non-insulated walls, small weep holes cut near the baseboard allow drainage and improve airflow through the wall cavity without major demolition. Insulated walls require a flood cut, a horizontal cut several inches above the water line that exposes saturated insulation and framing, so both can dry properly. Always check for electrical wiring and plumbing before any cutting, and use a staggered cut pattern on firewalls as required by code.
How to confirm the drywall is actually dry
A moisture meter is the only reliable way to confirm that drywall has returned to a safe moisture content, which for gypsum is under 1%. Professional drying with proper equipment takes 3 to 5 days; without it, the material can take weeks, and mold is likely growing the entire time. Patching over damp drywall traps moisture inside the wall cavity and guarantees a mold problem. Skipping the moisture check is the most common reason wet drywall repairs fail and require tearing out again within a year.
Drywall replacement vs. repair: making the right call
This is the decision most homeowners wrestle with longest, and getting it wrong in either direction costs money. Match your situation to the right answer and move forward decisively.
Conditions that allow for a repair
The drywall is a candidate for repair when the water source was clean (a supply line or rain, not a drain), drying started within 24 to 48 hours, the panel shows no sagging or fastener failure, there's no mold growth, and the moisture content is returning to baseline. Moderate staining with intact structural integrity is the sweet spot for a repair-and-refinish approach. If all those conditions are met, you can save the panel and focus on cosmetic restoration.
Signs that point to full panel replacement
Replace the panel when you find a soft or crumbling texture, sagging or separation from the framing, visible mold on the surface, or saturation that has lasted longer than 48 to 72 hours. A practical rule of thumb: if damage affects more than 30% of a panel, patching is impractical both structurally and cosmetically, and replacing the whole panel is cleaner and faster.
Why contaminated water changes everything
Gray water from an appliance drain overflow and black water from sewage or floodwater both require full replacement, regardless of how the drywall looks or feels. Complete disinfection of a porous material like gypsum board isn't achievable, and the health risk makes salvage a non-option. If gray water sits longer than 48 hours, it escalates to black water category, which triggers the same mandatory replacement requirement. Leave contaminated water repairs to a licensed contractor with remediation experience; this is not a job for DIY.
Step-by-step wet drywall repair and ceiling restoration
Before any repair work starts, confirm the leak source is fixed. A perfect patch over an active leak is a waste of materials and labor. Work through the steps below in order; skipping ahead creates rework.
Fixing surface stains on a dry, intact ceiling
Start by cleaning the stain with a diluted bleach solution, 1 part bleach to 3 parts water, and scrape any peeling paint with a putty knife. Apply a stain-blocking primer like KILZ Original Oil-Based or Zinsser B-I-N over the entire stained area and extend slightly beyond the edges. Skipping the stain-blocking primer is the most common DIY mistake: standard latex paint will not seal a water stain, and the discoloration bleeds through no matter how many coats you apply. For guidance on selecting the right product, see this comparison of the best primer for water stains. Finish with two coats of ceiling paint using the correct roller nap for your ceiling texture.
Cutting out and replacing a damaged section
Mark a clean cut line extending beyond the soft or stained area to the nearest stud, then cut with a drywall saw. Inspect the framing for rot or mold before anything goes back in, and treat the cavity if needed. Cut new drywall to fit, screw it into the framing, and tape the seams with mesh tape followed by joint compound applied in thin, successive coats. Each coat needs to dry fully before the next one goes on. For ceiling-specific repair techniques and tips, review a practical walkthrough on repairing drywall ceiling water damage.
Retexturing and finishing for a seamless result
Feather the joint compound at the edges to create a gradual transition into the surrounding drywall, and sand lightly with fine-grit paper between coats. Prime the patch with a stain-blocking product before applying any finish paint. Texture matching takes practice: thin your compound to the right consistency (roughly pancake batter for spray textures) and test on scrap drywall first under the same lighting conditions as the repair area. A mismatched texture patch is the most visible cosmetic failure in DIY drywall work, and it's the hardest to fix after the fact. For broader renovation inspiration and finishing tips, check Top Remodeling and Construction Tips to Transform Your Home.
What drywall water damage repairs actually cost
Real numbers help you budget accurately and recognize a bid that's either too low to be credible or higher than the scope warrants.
Repair versus replacement cost per square foot
Mitigation alone, covering water extraction and drying, runs $3 to $7.50 per square foot. A spot repair including labor costs $50 to $75 per square foot, which sounds high until you understand why: a contractor buys a full sheet regardless of the patch size, and setup time doesn't shrink with the repair area. Full restoration covering demolition, replacement, finishing, and paint ranges from $20 to $37 per square foot for larger scopes, because the labor cost spreads across more material.
Hidden costs that push projects over the initial estimate
Mold presence adds $10 to $30 per square foot for remediation on top of the drywall work. Ceiling water damage repair runs higher than wall repairs due to the added difficulty of working overhead and the setup time involved. Structural framing damage or rotted blocking requires carpentry before drywall can go back in, which adds both time and cost. For very small jobs, most contractors charge a flat minimum of $1,000 to $1,500 rather than a per-square-foot rate, because the economics of a 9-square-foot patch simply don't work any other way.
When to stop DIYing and call a professional
This isn't a scare tactic. Some water damage situations genuinely exceed what a homeowner can safely or effectively handle, and recognizing the line early saves money in the long run.
Signs the damage has moved past a homeowner fix
Hand the job off when mold covers more than 10 square feet, when structural framing is damaged, when the water source was contaminated, when the damage has returned after a previous repair, or when you don't have access to a moisture meter to verify dryness. Skipping professional moisture assessment is the most common reason water damage repairs fail the second time. Guessing that the wall is dry and patching anyway is an expensive assumption.
What seamless professional restoration actually looks like
A proper professional restoration starts with verified moisture readings before any panel goes back up. The tape and finish work disappears under paint, the texture matches the surrounding surface under real lighting conditions, and the finished product genuinely looks like the damage never happened. That last part is harder to achieve than most homeowners realize, and it's where the gap between a DIY patch and a professional finish becomes obvious. When a job exceeds homeowner scope, following professional standards prevents repeat visits and hidden costs.
At 3H Construction, we handle drywall restoration after water and storm damage across coastal Mississippi, including Bay St. Louis, Gulfport, Biloxi, and Ocean Springs. We're licensed (MS #21881) and BBB A-rated, and owner Ryan is on-site through every job, giving clients a single point of accountability rather than a rotating crew. Our approach reflects Living the Gulf Coast Way, blending indoor comfort with coastal resilience. We offer free estimates, and our work is done right the first time, no callbacks. If you're dealing with drywall water damage beyond a surface stain, that's exactly the kind of job we're built for.
The bottom line on water-damaged drywall
Act within 24 to 48 hours, confirm the source is fixed before touching anything, assess honestly whether the panel can be saved, and follow the repair steps in sequence. Cutting corners at any point in that chain creates a bigger problem downstream, and bigger problems cost more to fix. For guidance on planning and timing larger projects, see Renovation Timelines: Why Start Planning Now.
The line between a manageable DIY patch and a professional restoration job is real and worth respecting. For Gulf Coast homeowners dealing with anything beyond a cosmetic stain on dry, structurally sound drywall, reach out to 3H Construction for a free assessment. We'll tell you exactly what you're dealing with and what it takes to make it right.
0 Comments